Listing Item Profiles
Perform the following steps to list a new item profile.
- Navigate to the Item Profile Listing page by selecting Store Management>Item Profiles. The Item Profile Listing page appears.
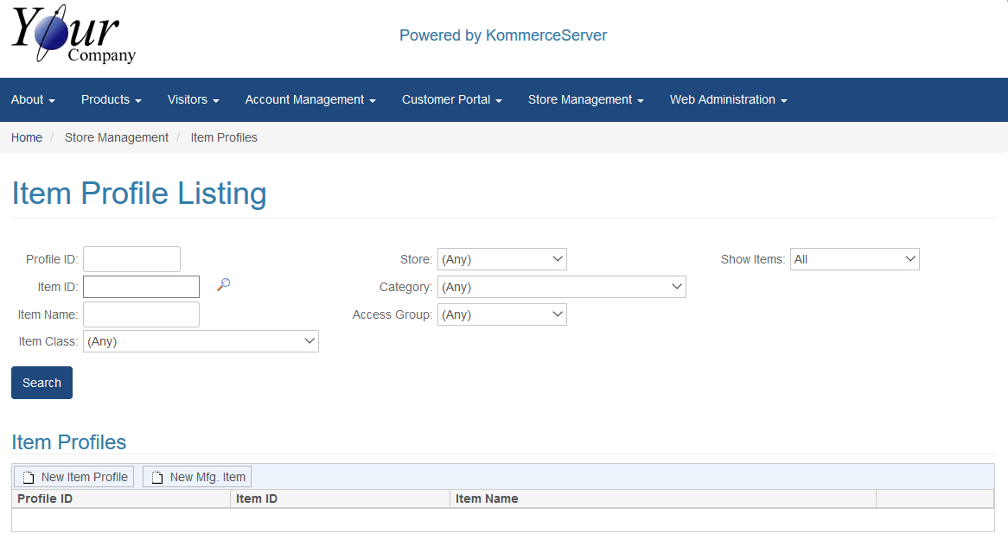
- Click the New Item Profile button. The Item Profile Definition page appears.
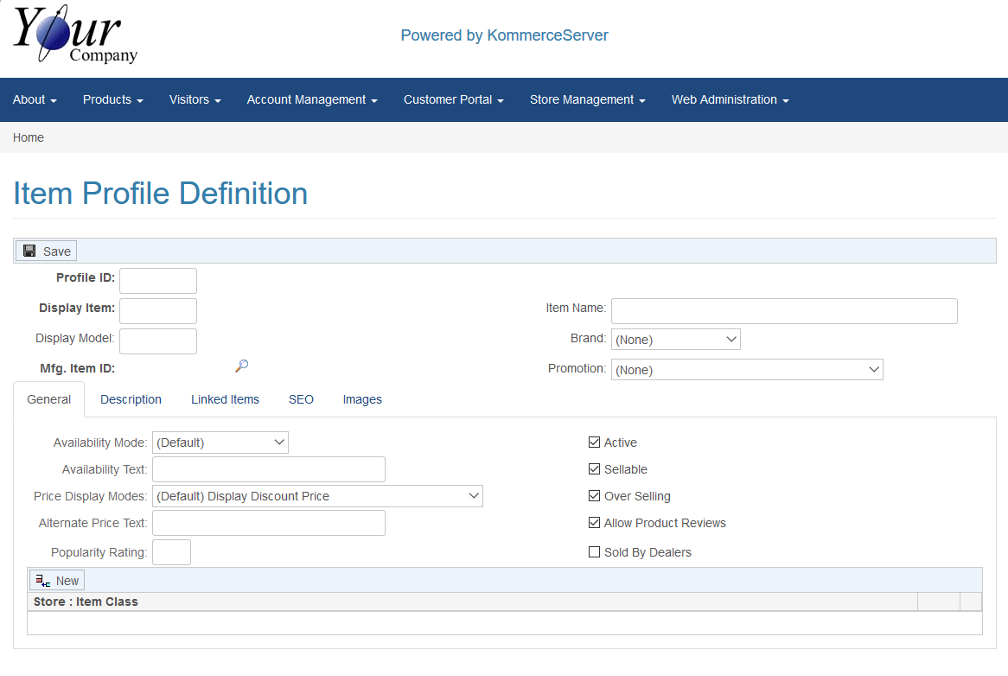
- Enter your internal profile ID for the item in the Profile ID field.
- Enter your internal display ID for the item to the Display ID field.
- Click the search icon next to the Mfg. Item ID field to search for and select an applicable Mfg Item ID for the item profile you are defining. For more information on Mfg. Items, see the Item Master Listing Page topic.
- If you want to assign a particular brand to your item profile, select it in the Brand drop-down menu.
In order to use the Brand drop-down menu for your item profile, you must first define the brands you want to use on the Brand Listing Page.
- Enter a name for your listing in the Item Name field. The name you enter here will appear as the item title in your product catalog.
- If you want to assign a promotion to the item profile, select it in the Promotion drop-down menu.
In order to use the Promotion drop-down menu for your item profile, you must first define the promotions you want to use on the Promotion Listing Page.
- Select the product availability mode you want to use from the Availability Mode drop-down menu.
- If you want to enter a custom text message regarding the availability of your listed item, enter it in the Availability Text field.
- Select a price display mode in the Price Display Modes drop-down menu.
- If you have selected either the Display Price in Cart only, Never Display Price (not sellable), or Request for Quote (not sellable) option in the Price Display Modes drop-down menu, you can enter alternate price text in the Alternate Price Text field.
- If you want to enter a number that will enable users to sort products by popularity during product searches, enter it in the Popularity Rating field. The smaller the number you enter here, the higher it will rank in search results.
In order to use this option with your searches, you must first create a popularity rating search property on the Search Property Configuration Page.
- Be sure that the Active checkbox is selected if you want the item to appear in your store catalog. When deselected, the item will not appear in your store catalog.
- Be sure that the Sellable checkbox is selected if you want your customers to be able to purchase the item. When deselected, customers will not be able to purchase the item.
- Select the Over Selling check box if you want to be able to sell beyond your current inventory levels of this item.
- Select the Allow Product Reviews checkbox if you want users to be able to write and submit product reviews for this item.
- Select the Sold By Dealers checkbox if your item is going to be sold by dealers.
- To add an item class for this item profile, click the New button and select an item class from the drop-down menu that appears.
- Click the Description tab. The Description area appears in the area below.
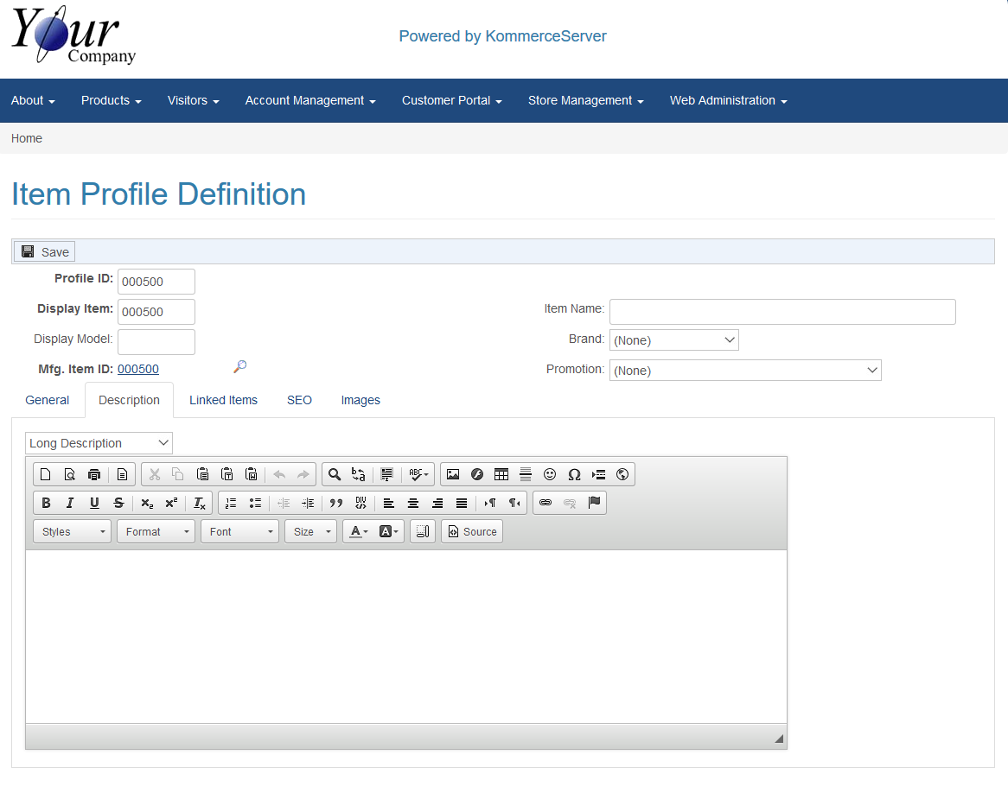
- Select the type of the description you want to add from the drop-down menu that appears above the formatting tools.
- Enter a description of the item, using the formatting tools to customize the look and feel of the text.
- Repeat steps 21 and 22 until you have entered long, short, and technical descriptions of the item as necessary.
- Click the Linked Items tab. The linked items area appears below.
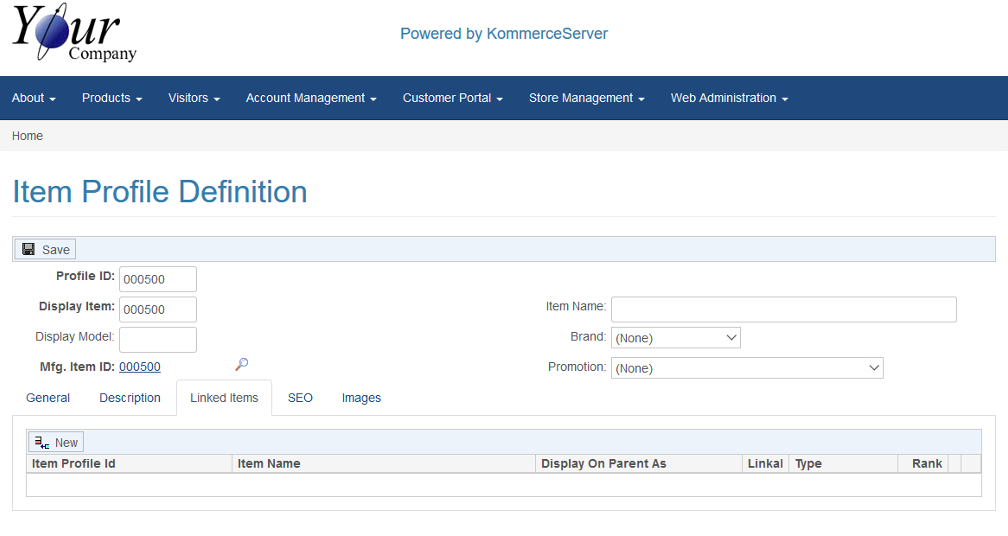
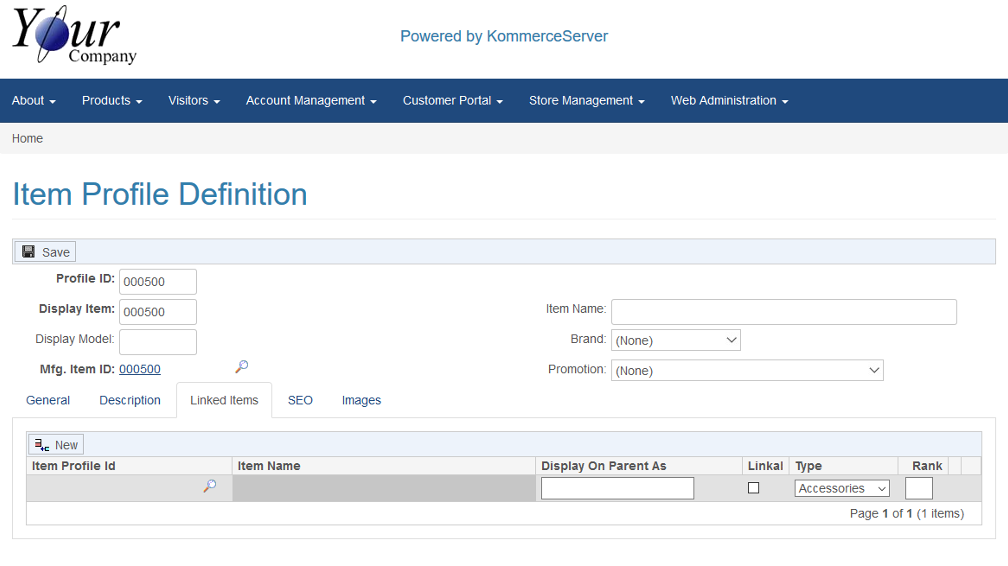
- Perform the following steps to add a linked item:
- Click the search icon that appears next to the Item Profile ID field to search for and select an Item Profile ID.
- If you want to enter custom text for the linked item to define how it will appear on the product pages, enter it in the Display on Parent field.
- Select the Linkable checkbox in order for the item to be displayed on the product listing. If you deselect the Linkable checkbox, the item will not be displayed on the product listing.
- Select the type of link you want to use on the product pages in the Type drop-down menu.
- Enter a rank for the link to determine where the link appears on the product pages. A lower number will cause the link to be displayed higher than the other links and a higher number will cause the links to be displayed lower than the other links on the page.
- Click the SEO tab. The SEO area appears below.
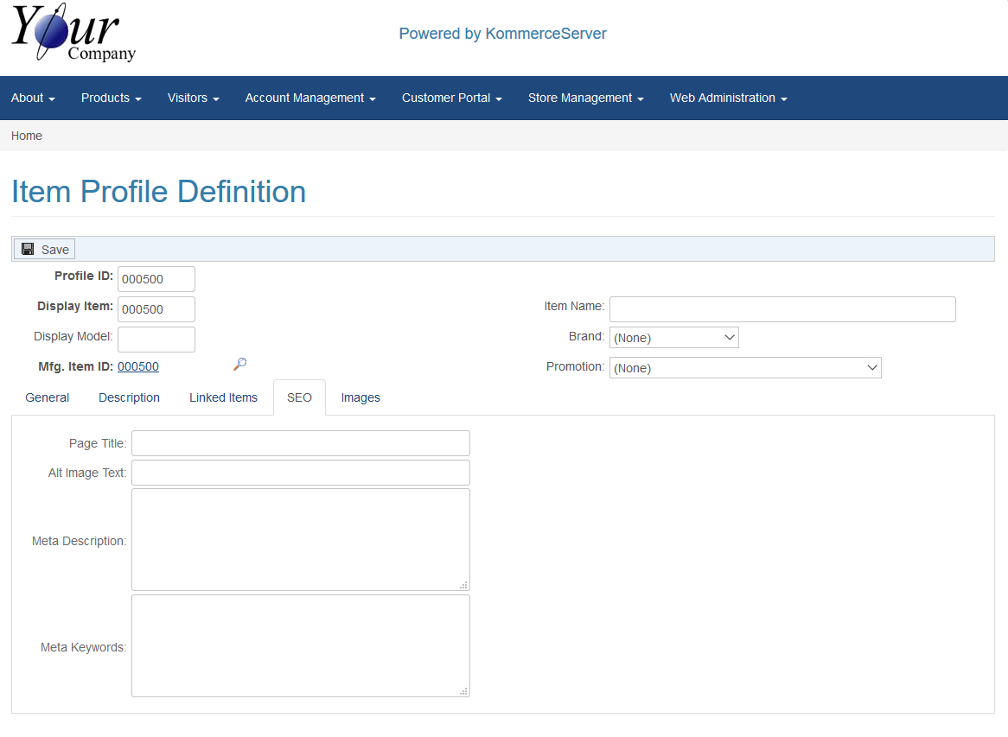
- Perform the following steps to enter your SEO keywords.
- Enter a title for the page in the Page Title field.
- Enter text for your alt image in the Alt Image text field.
- Enter a meta description for the item in the Meta Description field.
- Enter meta keywords for the item in the Meta Keywords field.
- Click the Images tab. The Images area appears below.
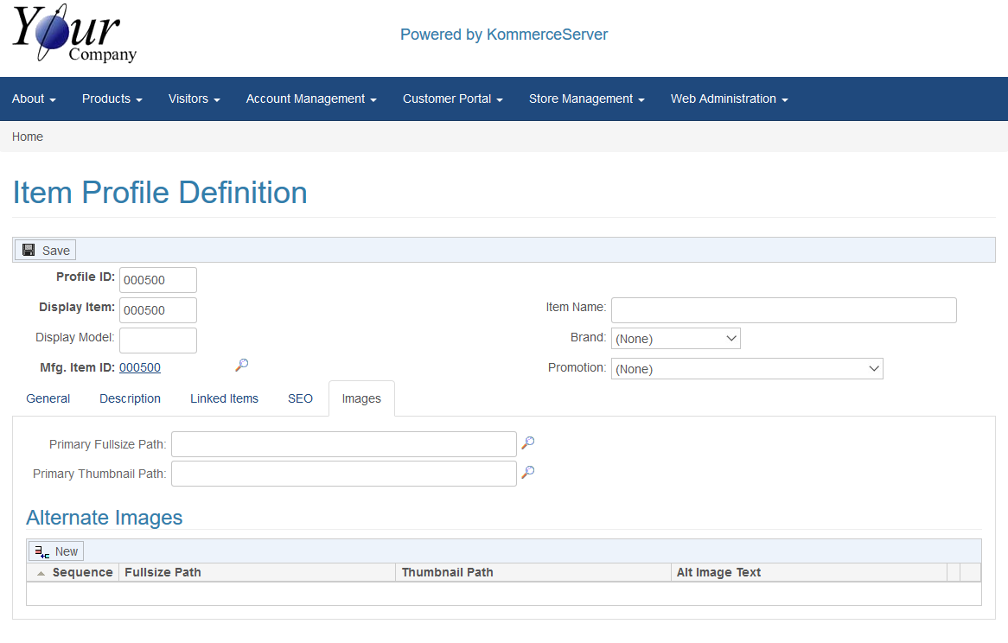
- Click the search icon that appears next to the Primary Fullsize Path field to search for and select an image for your primary full size image path.
- Click the search icon that appears next to the Primary Thumbnail Path field to search for and select an image for your primary thumbnail image path.
- If you want to select an alternate image, click the New button under the Alternate Images header. A new line item appears below.
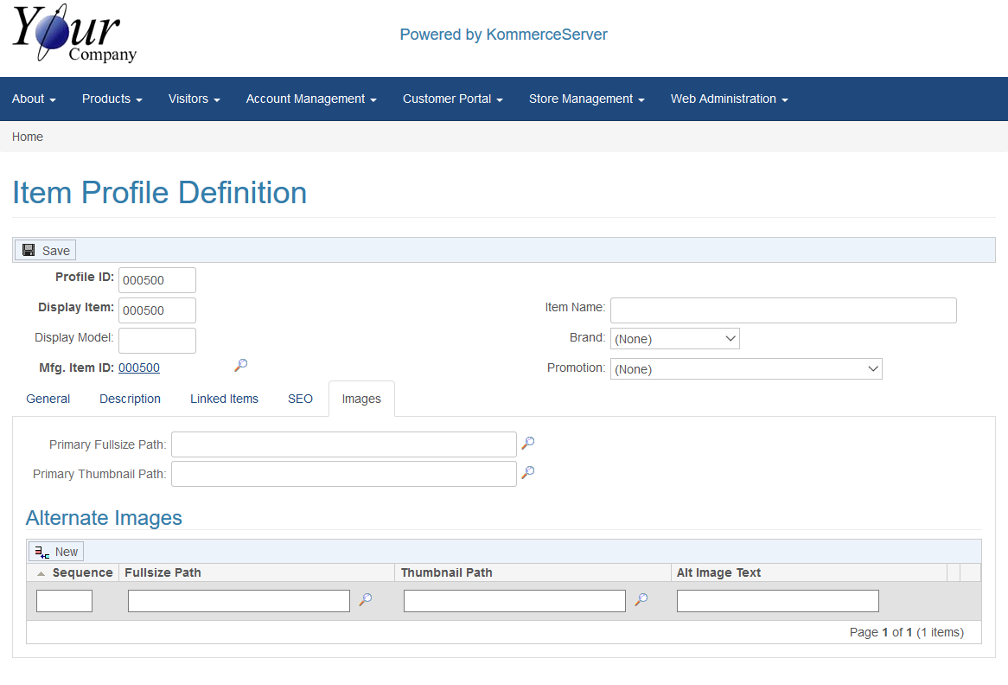
- Perform the following steps to select an alternate image.
- Enter a sequence number for the image in the Sequence field.
- Click the search icon that appears next to the Fullsize Path field to search for and select a full size image.
- Click the search icon that appears next to the Thumbnail Path field to search for and select a thumbnail image.
- Enter alt image text for the image in the Alt Image Text field.
- Click the Save button to save your item profile.